TL;DR
My wife is obsessed with Cornish Cream Tea — a British delicacy that requires Clotted Cream, which is virtually impossible to find in Brazil. To make it at home, you need to hold heavy cream at exactly 80°C (176°F) for 12 hours. No household oven can do that accurately. Solution? I grabbed an old electric oven, an ESP32, a temperature sensor, a relay, a 3D printer, and built a PID controller that held the temperature with a variation of just ±0.3°C. Perfect Clotted Cream. Happy wife. Mission accomplished.
The problem: when you visit the UK and come back addicted
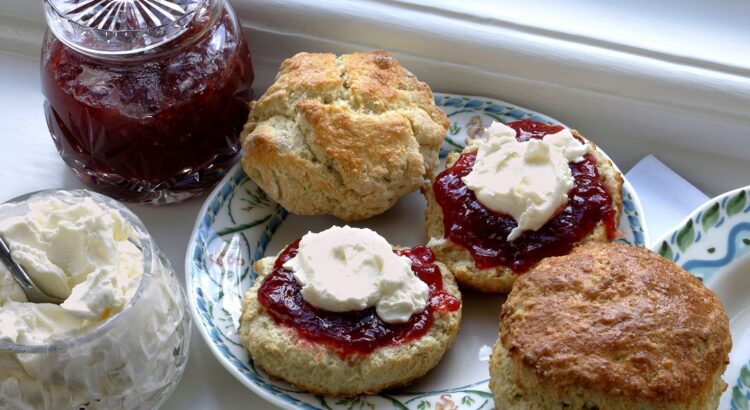
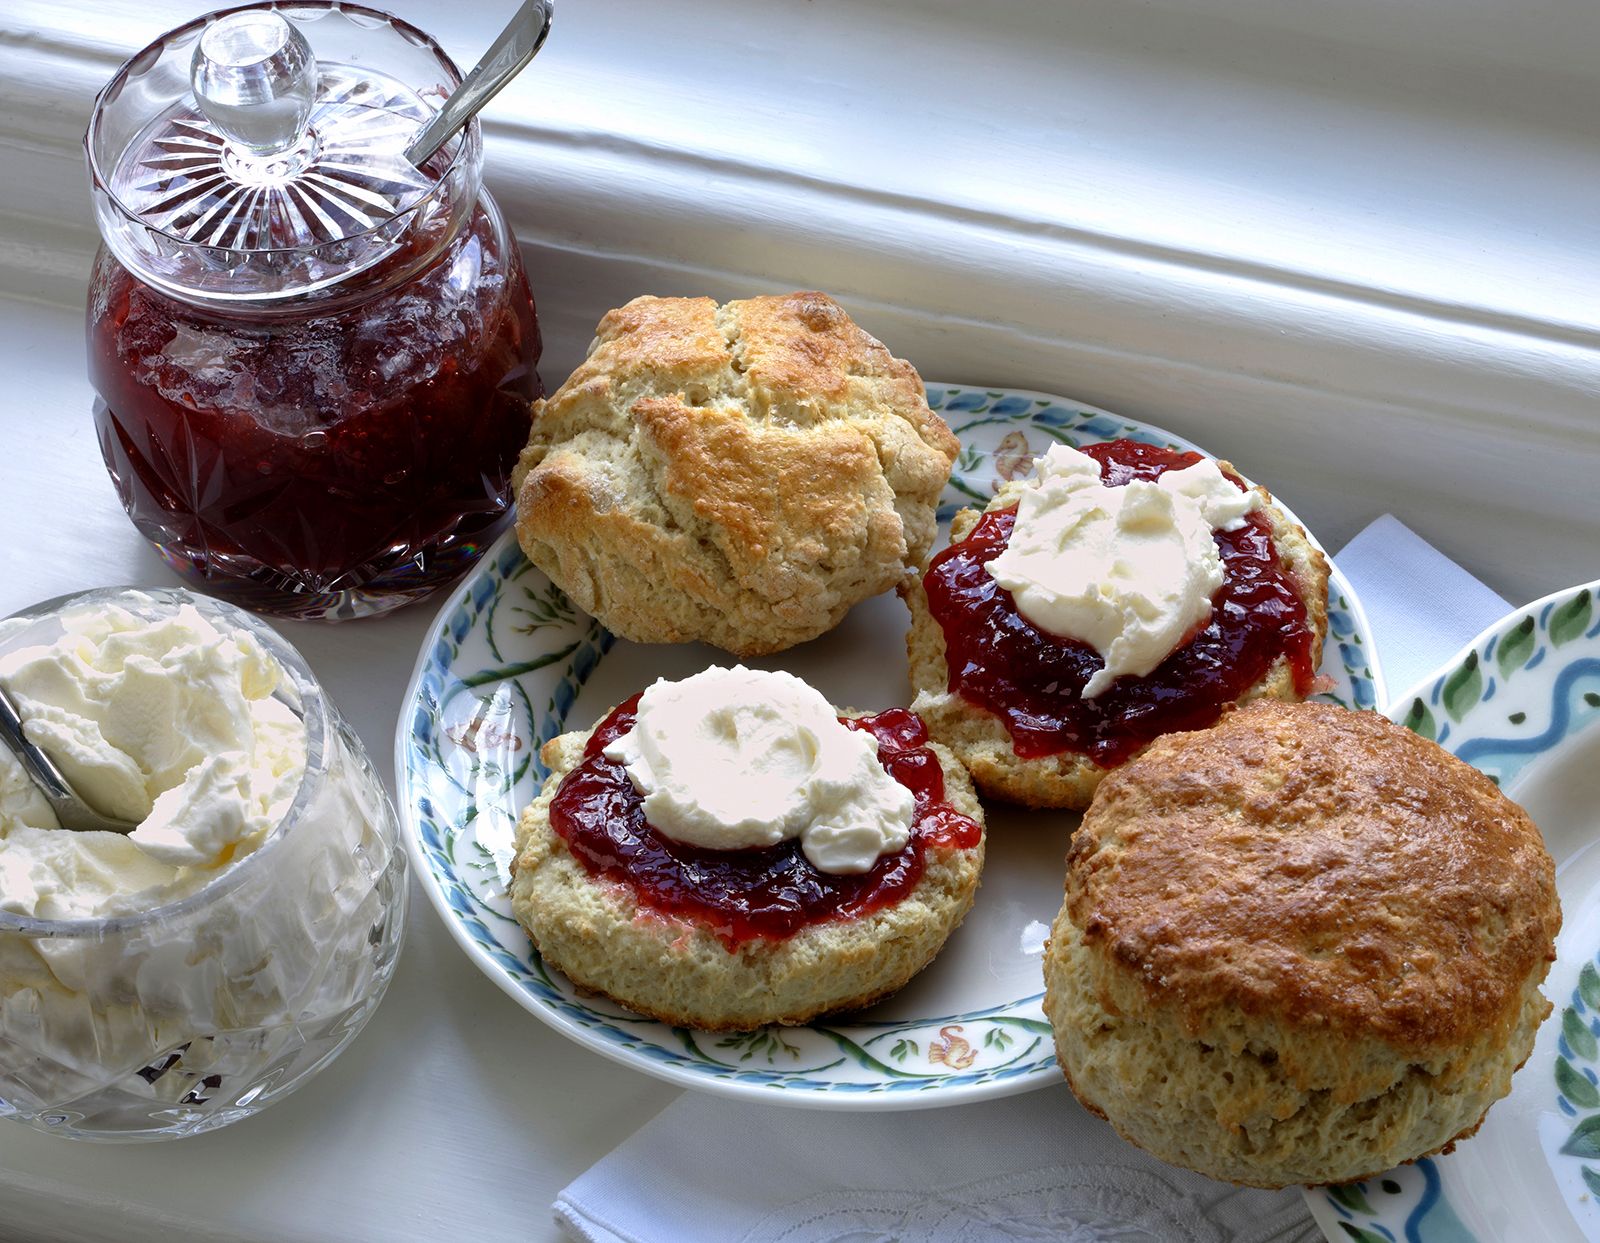
It all started on a trip to England, when our cousins over there introduced us to Cornish Cream Tea — a tradition from southwest England consisting of fresh scones, strawberry jam, and the sacred Clotted Cream (or Cornish Cream). My wife tried it and… that was it. Completely hooked. Ever since, she’s been passionate about it, and every time we remember that trip, the craving hits.
The scones? Easy enough to make at home. Strawberry jam? Any supermarket. But the Clotted Cream… that’s the problem.
Clotted Cream is an ultra-dense, velvety cream with a golden crust on top, with a flavor somewhere between butter and whipped cream — but it’s neither. It’s unique. And it’s addictive.
How do you make Clotted Cream?
The recipe itself is simple (almost provocatively simple):
- Get fresh heavy cream with a high fat content (minimum 35%, ideally above 45%)
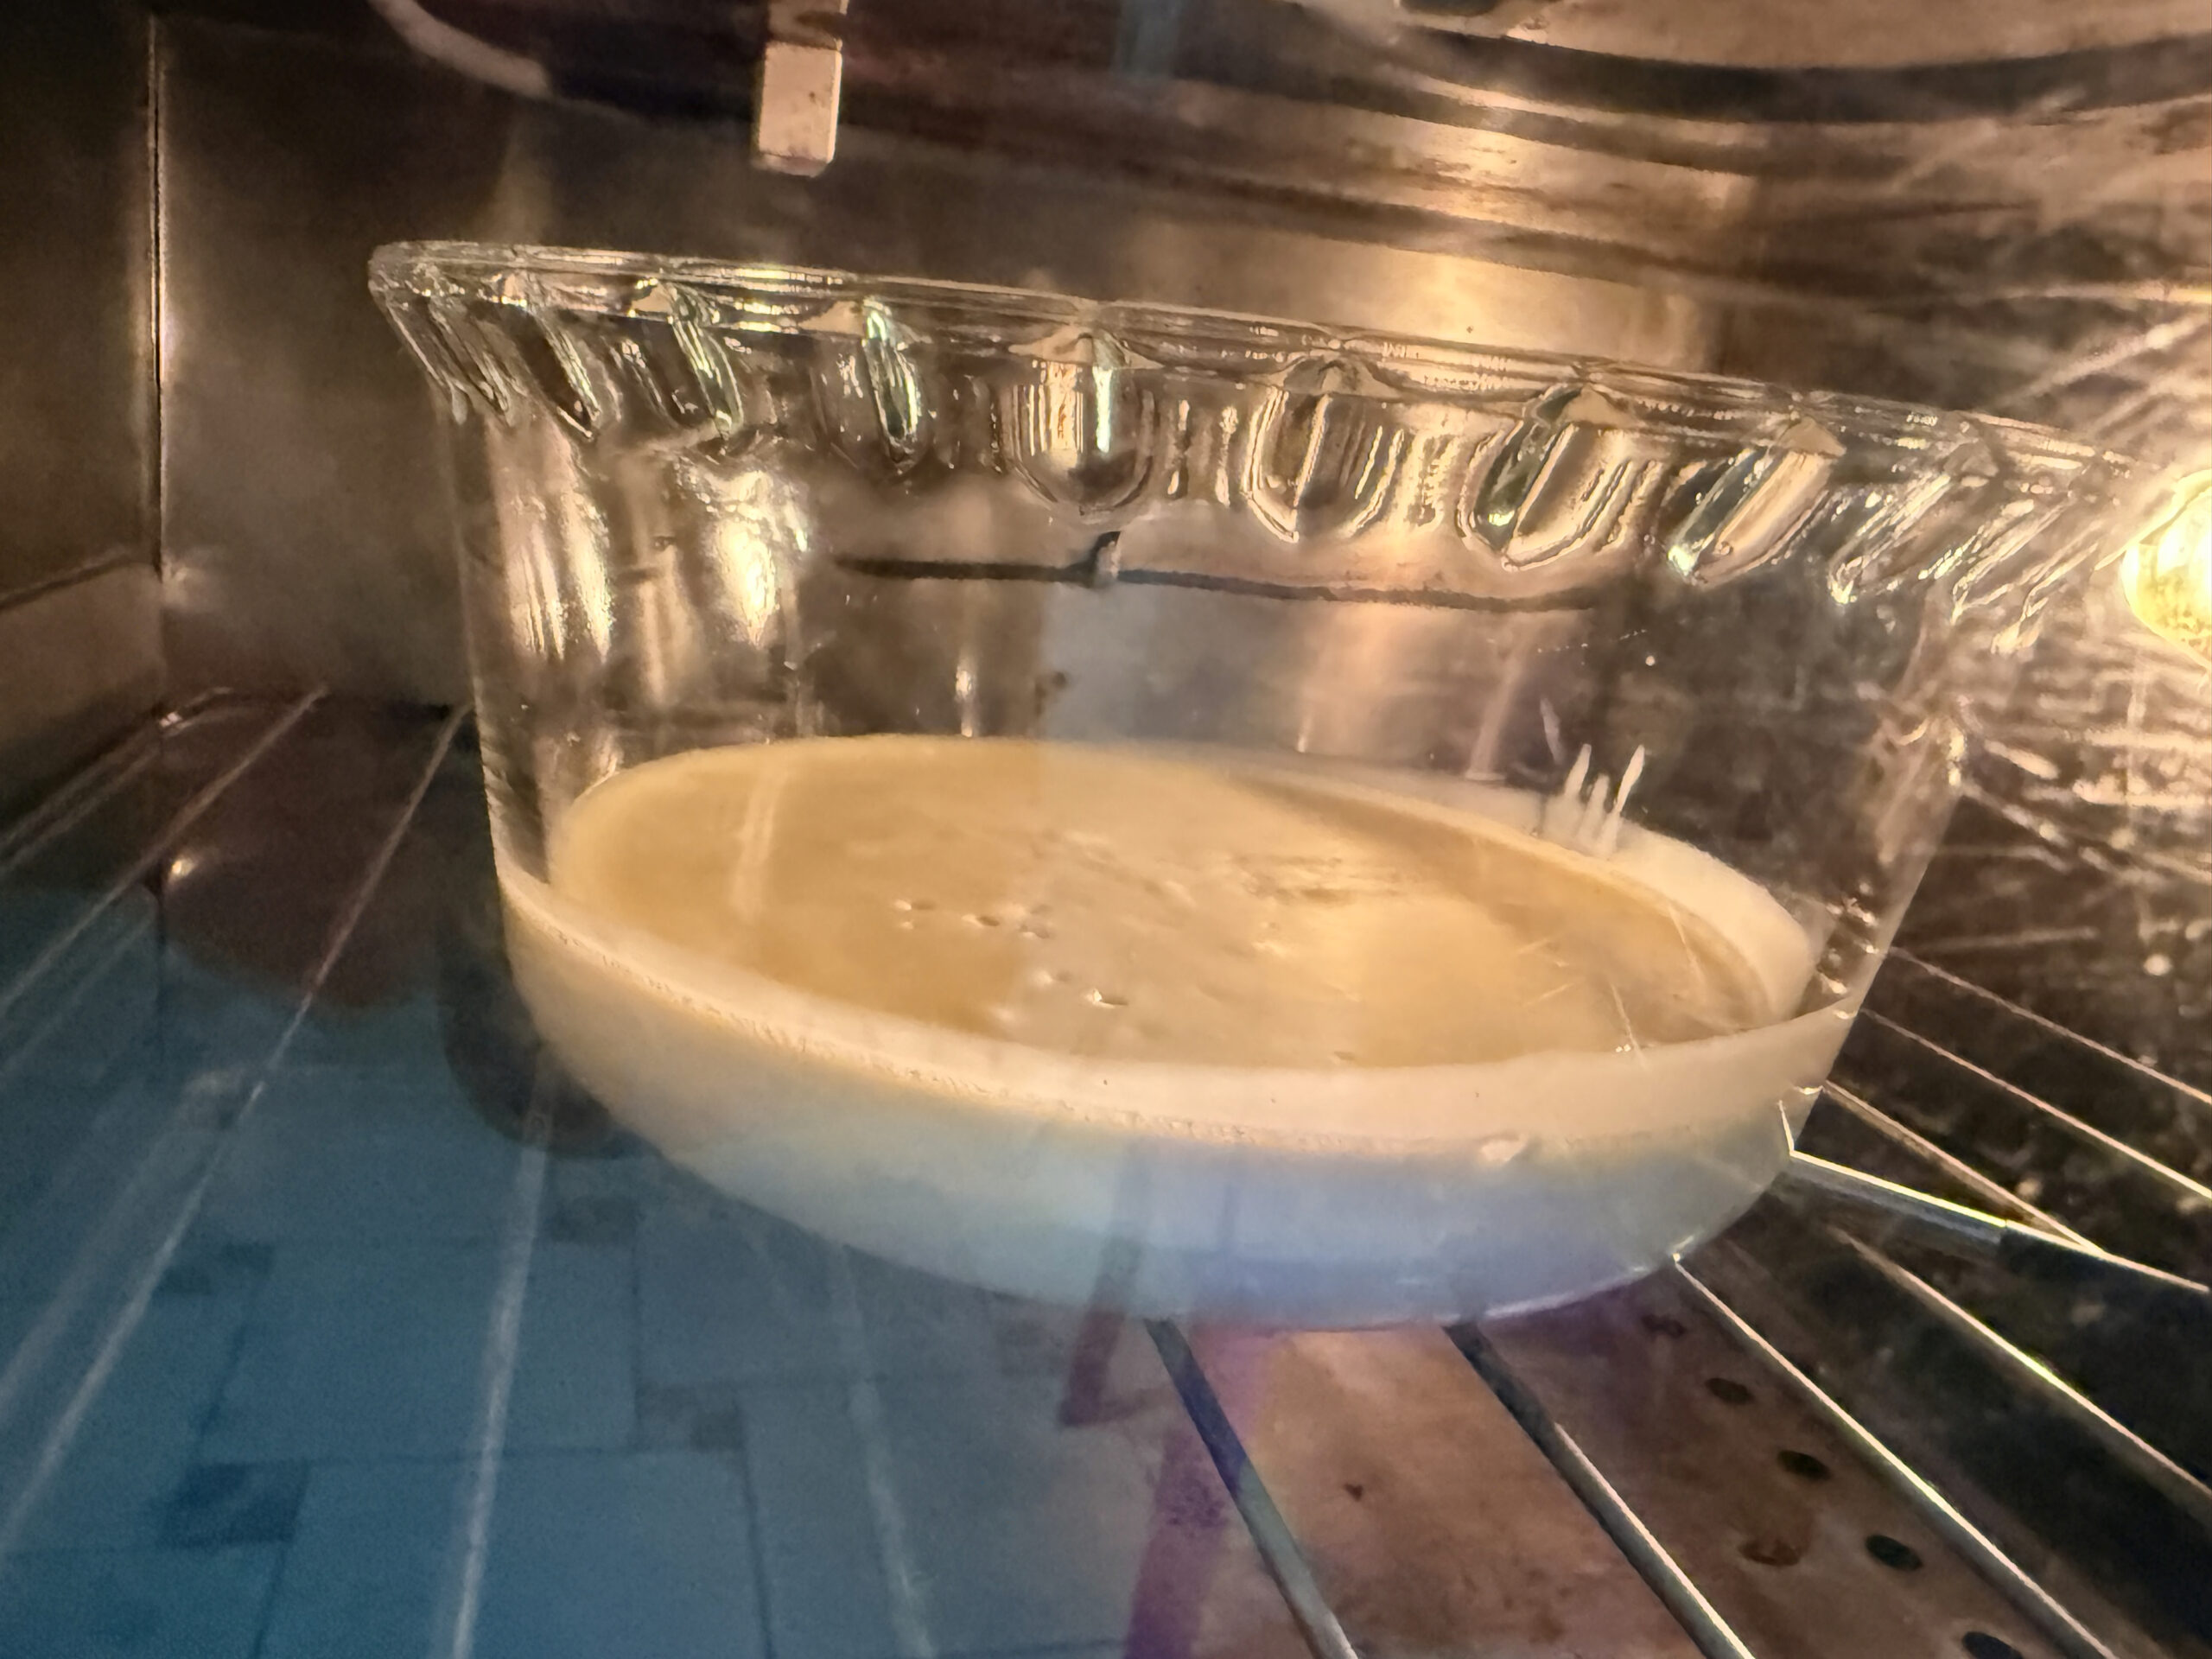
- Pour it into a shallow baking dish
- Bake at 80°C (176°F) for 10 to 12 hours
- Remove and let it cool slowly at room temperature
- Refrigerate for at least 8 hours
- The golden crust that forms on top is the Clotted Cream
Sounds easy, right? The problem is step 3.
80°C for 12 hours: easier said than done
Try setting your kitchen oven to 80°C (176°F). Go ahead, I’ll wait.
Most household electric ovens have a minimum temperature of 100°C (212°F) or higher. And even those that show lower temperatures on the dial weren’t designed to maintain a precise temperature in that range. The thermostat switches the heating element on and off crudely, creating oscillations of 10, 15, even 20 degrees. Gas ovens? Don’t even get me started — temperature control is even more unreliable.
And why does precision matter so much? Because:
- Below 75°C (167°F): the cream doesn’t clot properly, it stays runny
- Above 90°C (194°F): it starts to boil, forms bubbles, and instead of Clotted Cream you get a cooked cream with the wrong texture
- The golden crust: only forms with slow, even heating, without turbulence
In other words: I needed an oven that could hold exactly 80°C, with minimal variation, for 12 straight hours. And no household oven can do that.
The solution: an old oven + ESP32 + engineering (and a pinch of stubbornness)
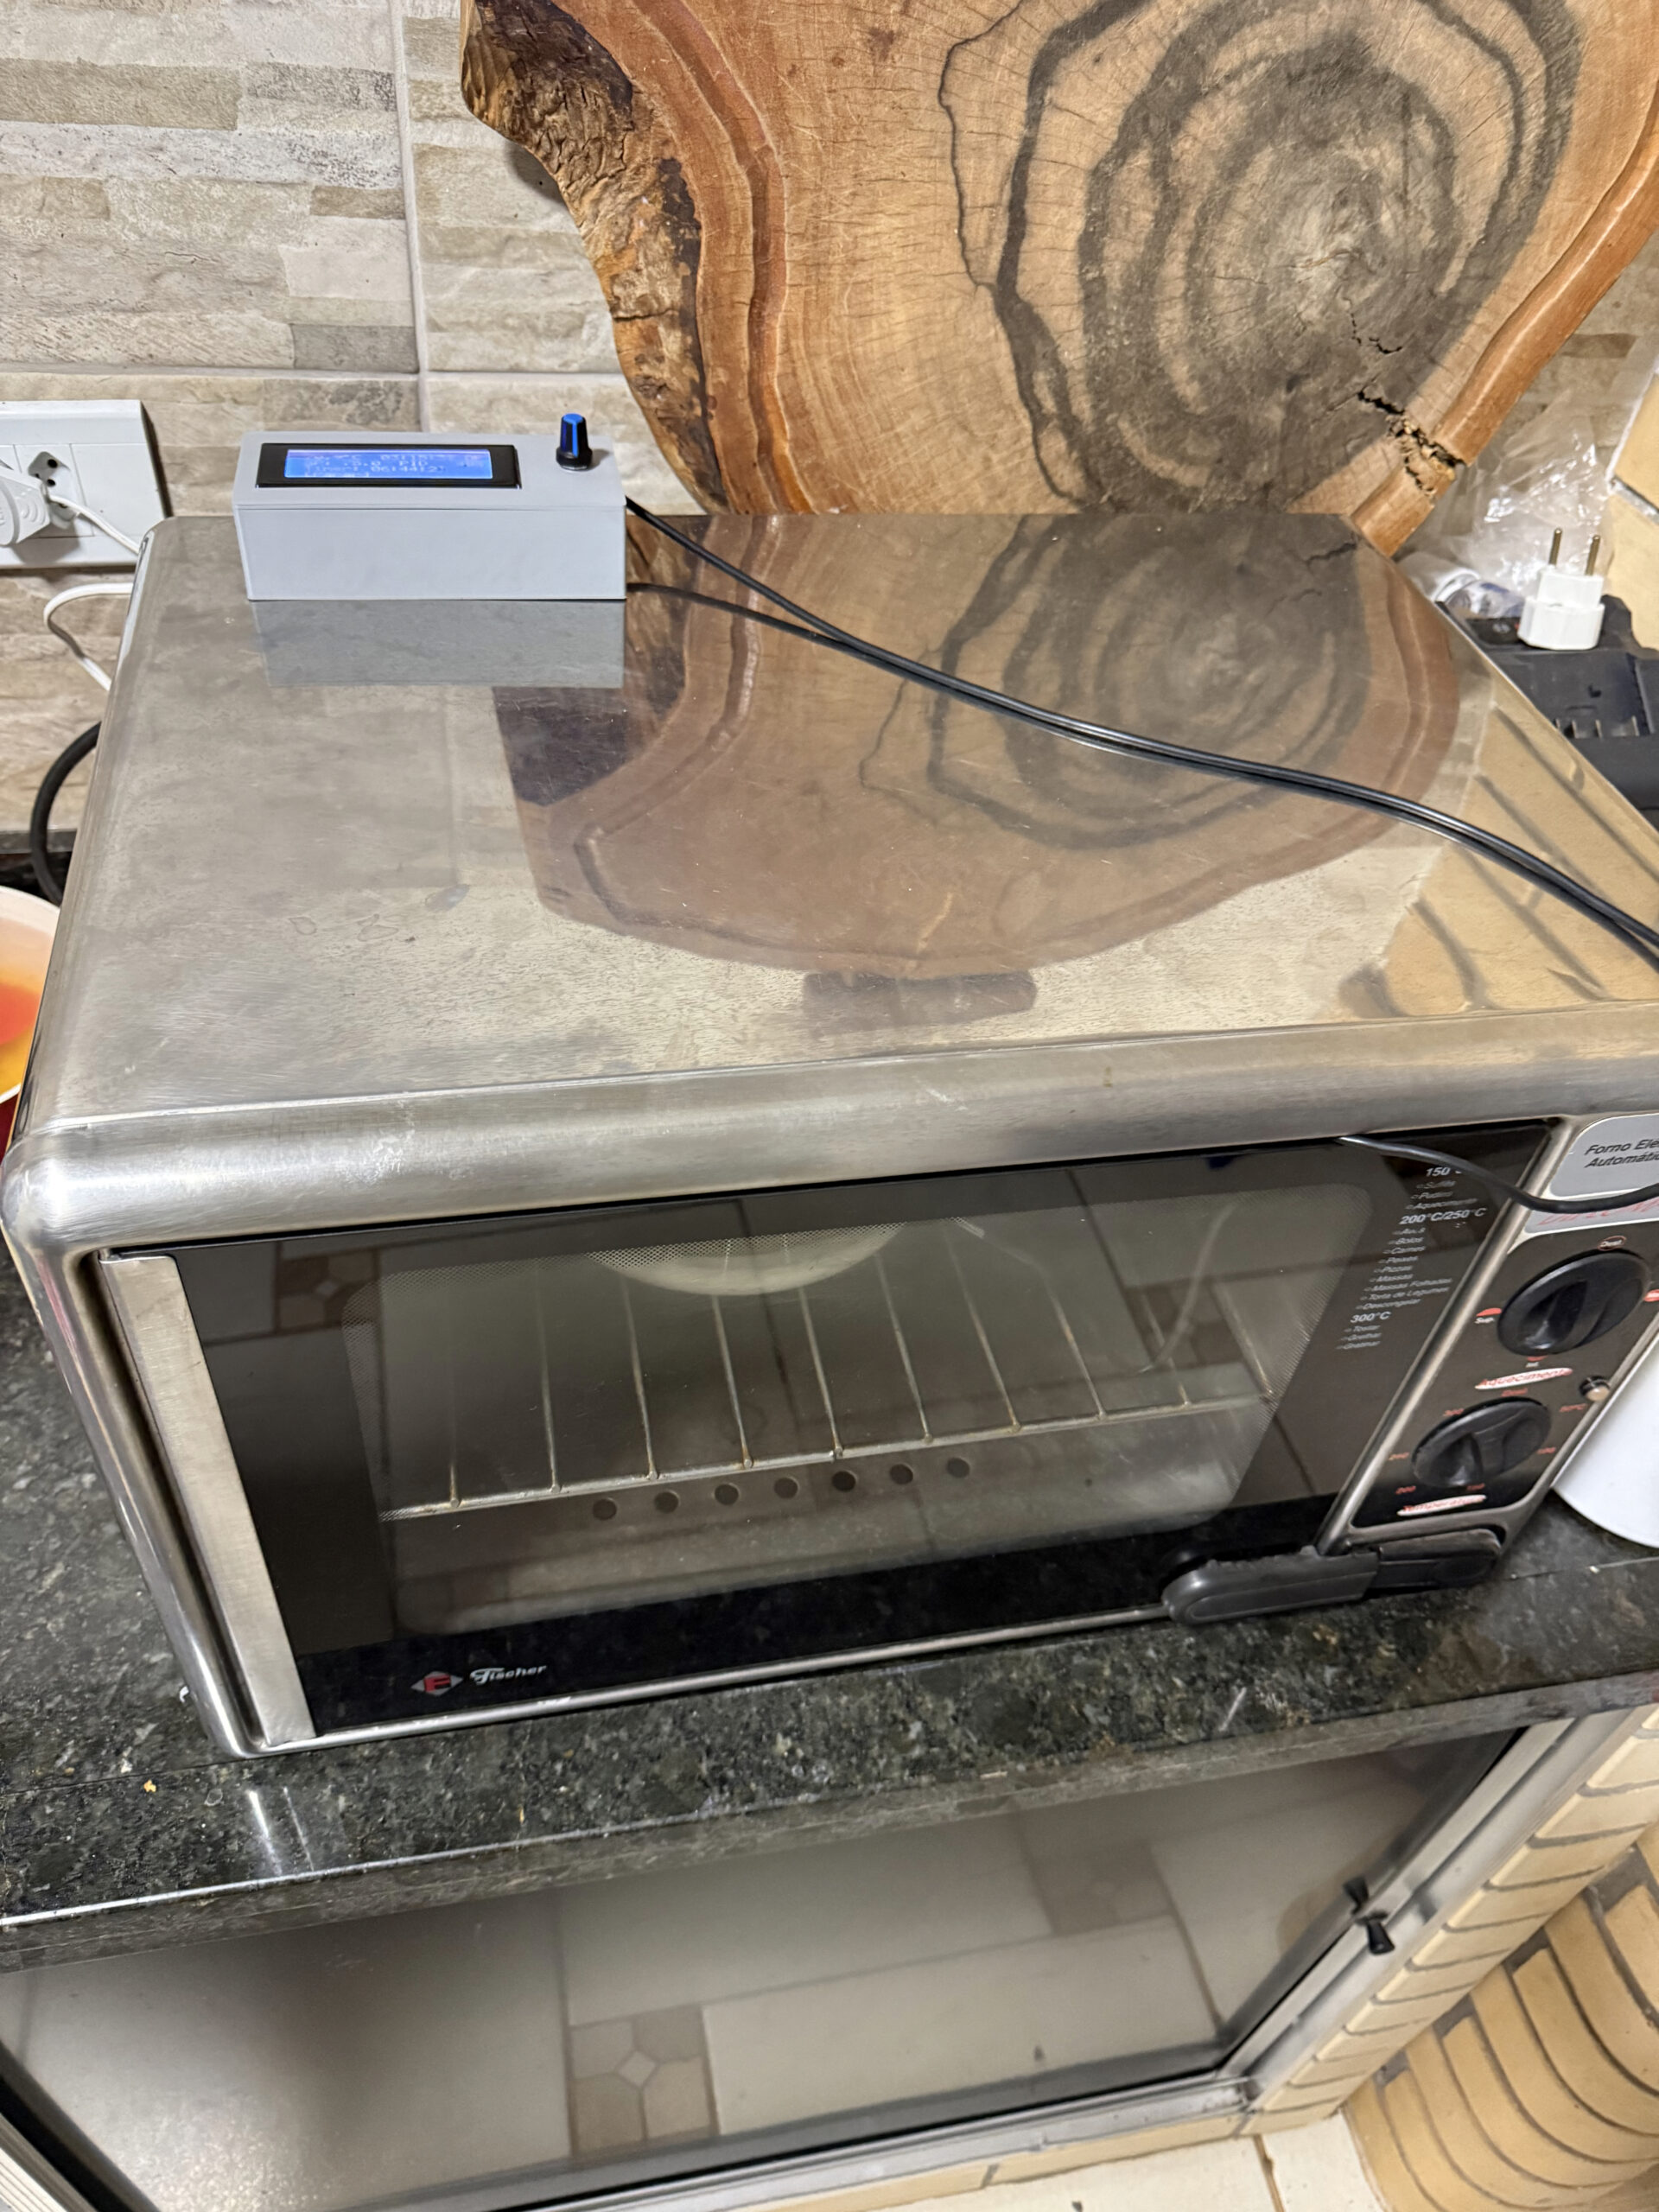
The idea was simple: take an old electric oven I had at home, remove the original temperature control, and replace it with a system I could program to control temperature with precision.
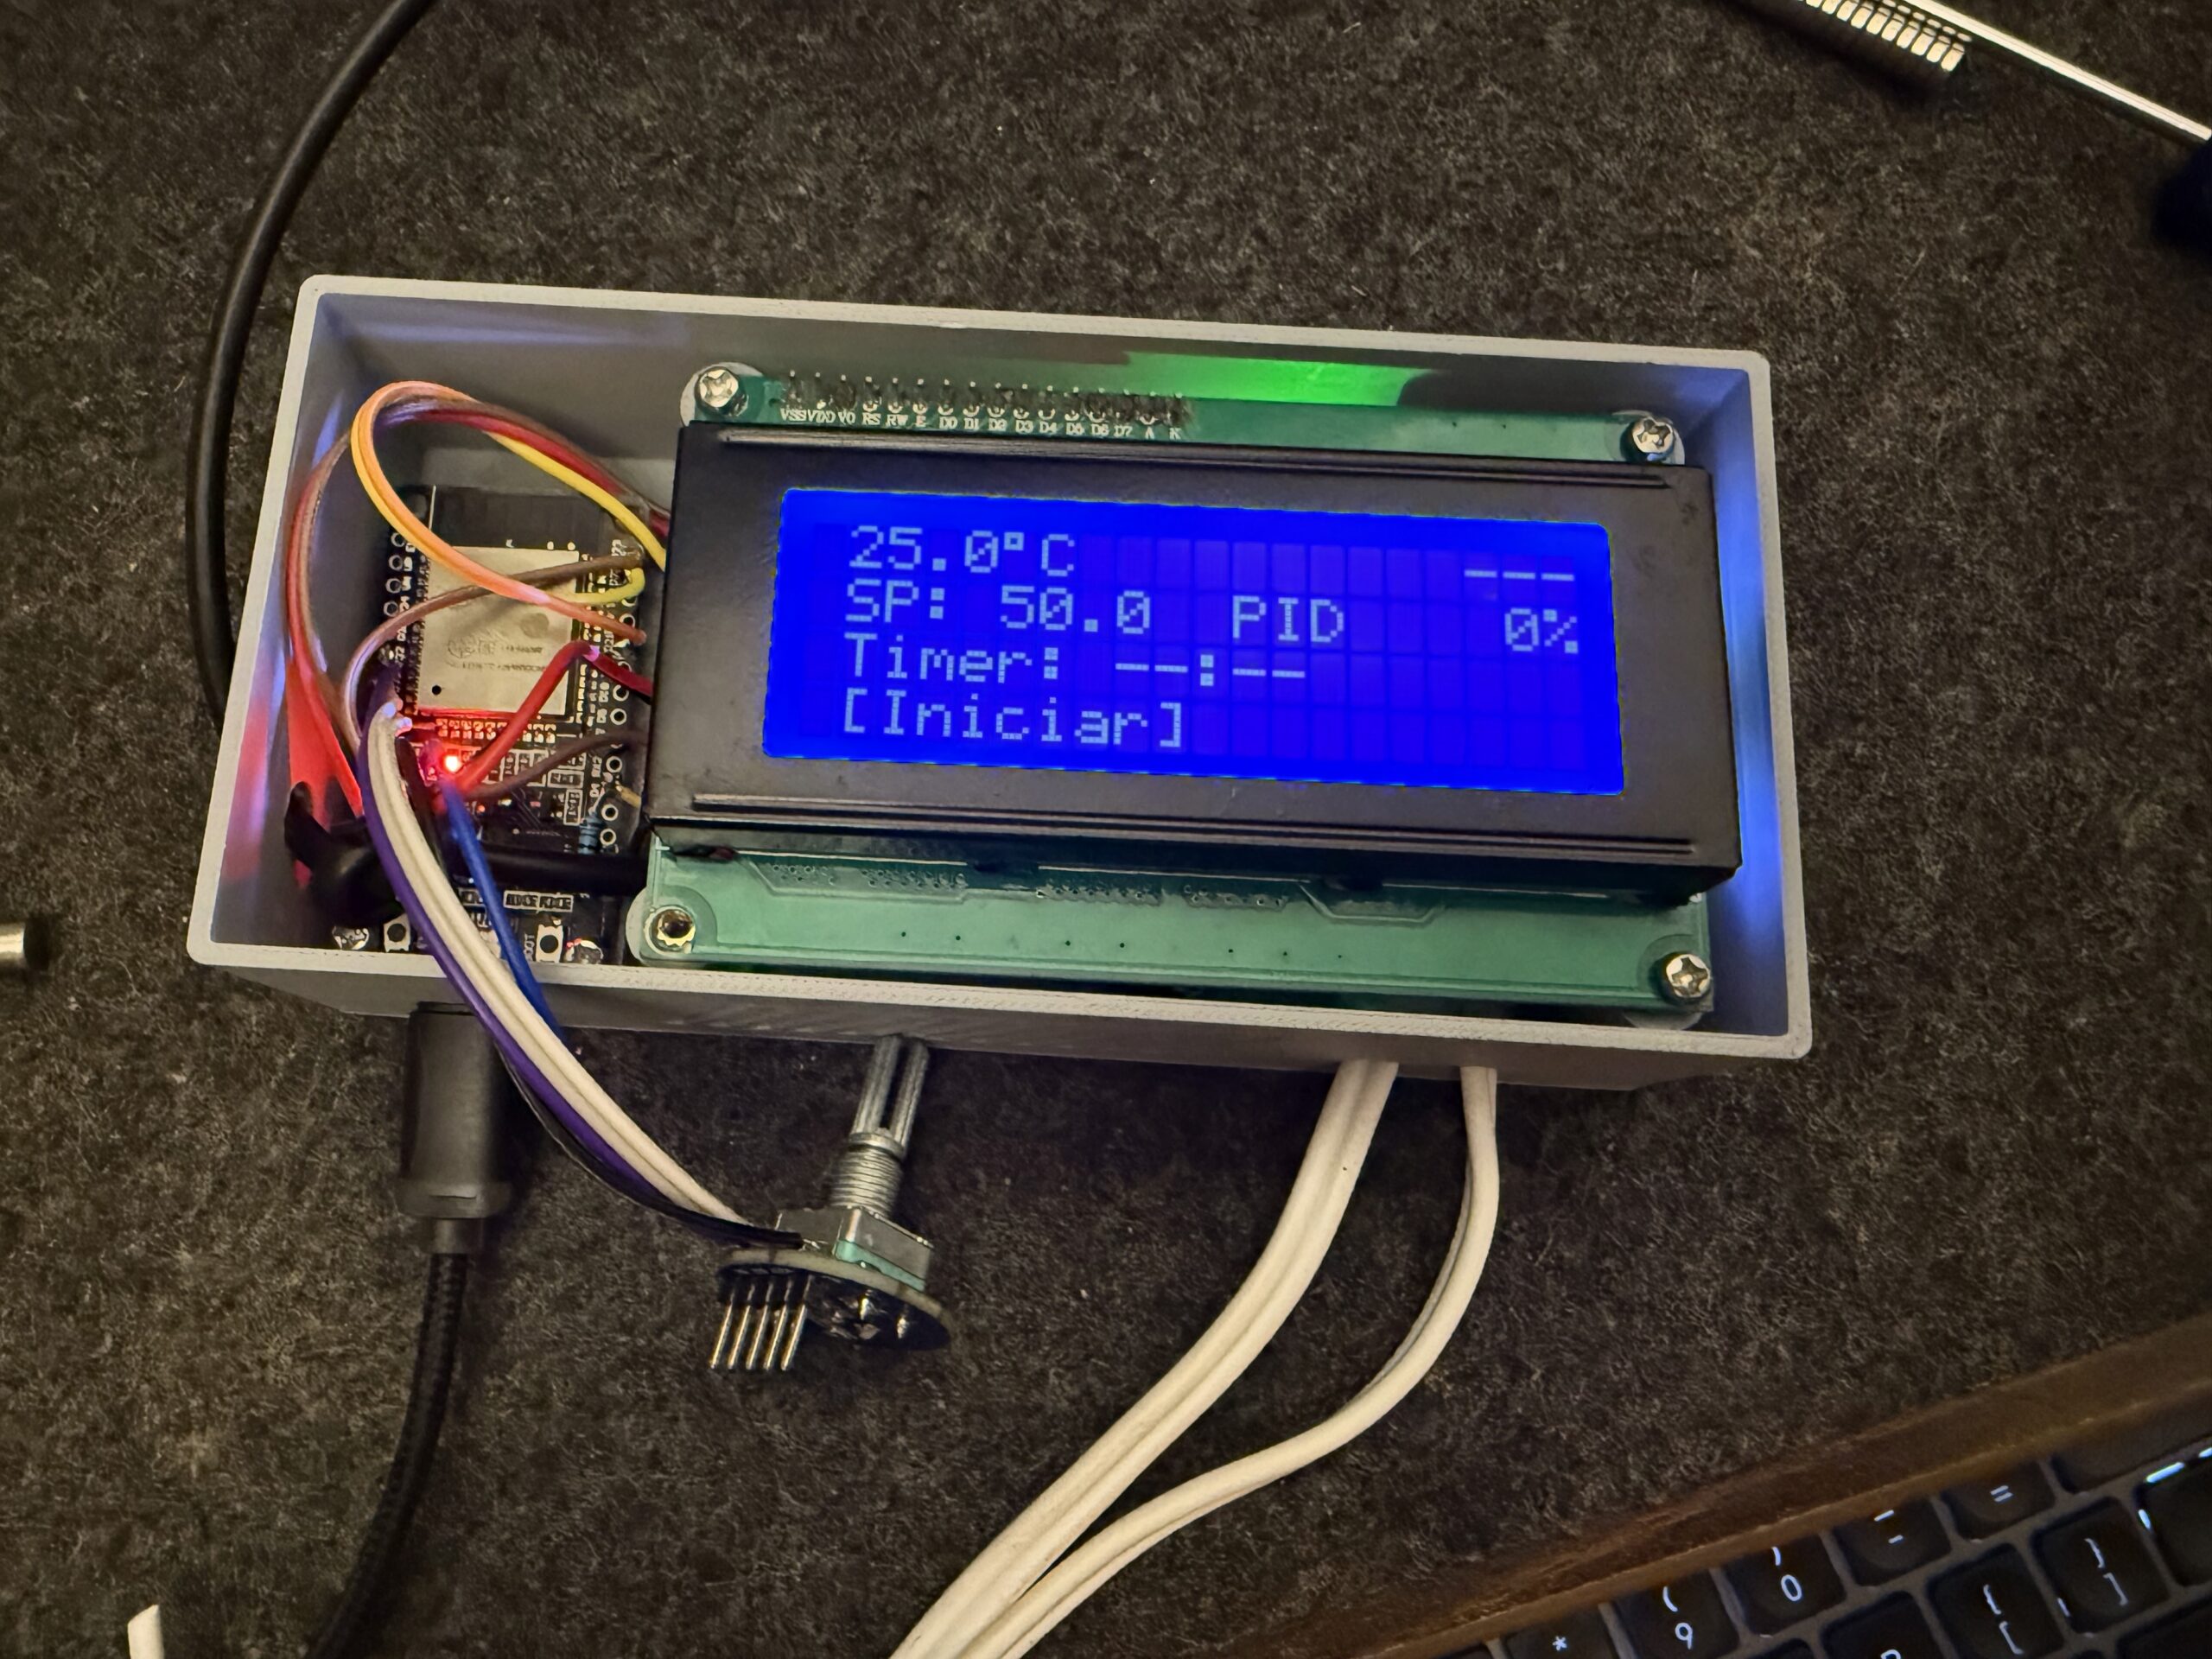
The hardware
| Component | Function |
|---|---|
| ESP32 DevKit V1 | The brain of the operation |
| DS18B20 | Digital temperature sensor (±0.5°C accuracy) |
| 1-channel Relay Module | Switches the oven’s heating element on/off |
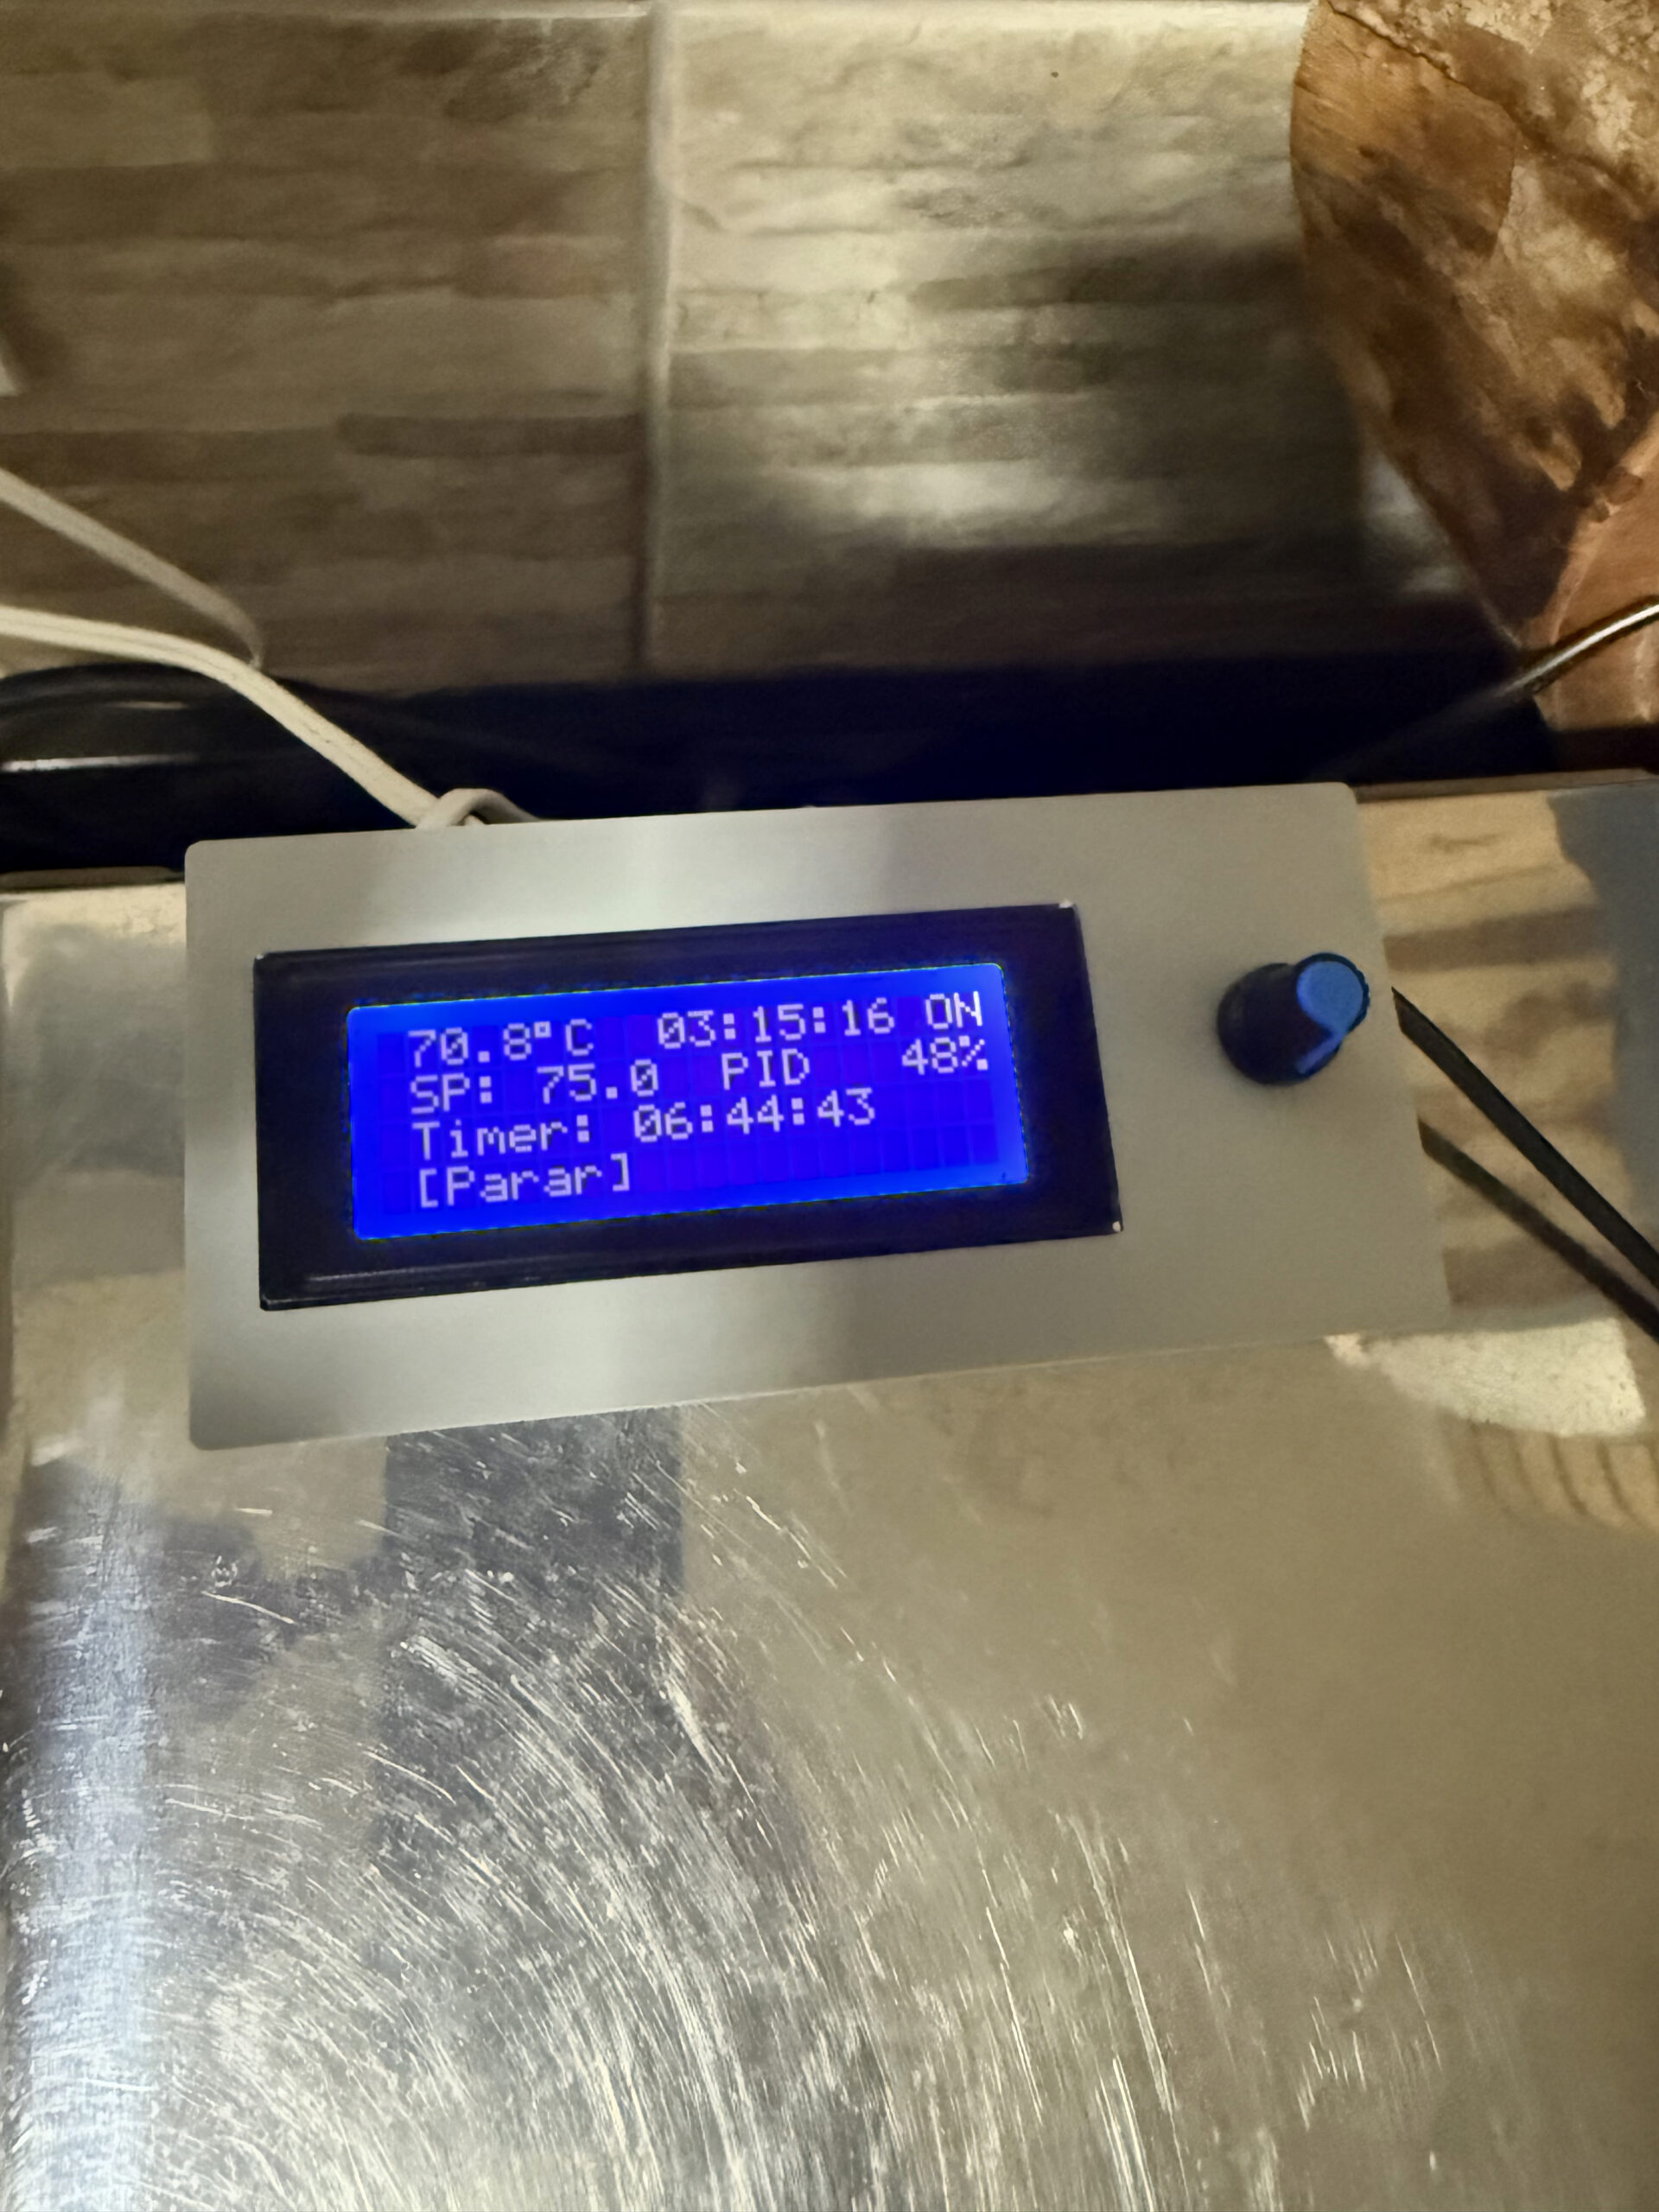
| LCD 20×4 I2C | Visual interface (temperature, timer, graph) |
| KY-040 Rotary Encoder | Navigation and adjustments (no keyboard or phone needed) |
| 3D-printed enclosure | Because presentation matters |
Total hardware cost: ~$15 USD (not counting the oven and the 3D printer, which I already had).
The software
This is where the magic happens. The system implements a PID controller (Proportional-Integral-Derivative) — the same type of algorithm used in industrial process control to maintain extremely high precision.
Without going into too many technical details (there’s a link to the repository at the end), the software features:
- 3 control modes: Hysteresis (simple on/off), PID On/Off, and PID Window (time-proportional — the most precise)
- Auto-tune: the system tunes the PID parameters automatically, using the Tyreus-Luyben method (more conservative than the classic Ziegler-Nichols, ideal for slow thermal systems like an oven)
- 10 equipment presets: saves configurations for different ovens/processes
- Timer up to 24 hours: with automatic shutdown
- Temperature graph on the LCD: yes, on a character display (7 time scales, from 10min to 12h)
- Power failure recovery: if the power goes out, when it comes back it asks if you want to resume where you left off
- Remote control via Blynk: monitor from your phone (optional — works 100% offline)
- Safety system: over-temperature protection (≥100°C), sensor failure and stuck relay detection
All of this in ~2,500 lines of code, organized into 10 modules. And the most impressive part: I built the entire software in 1 day, using Claude Code as a pair programming copilot. But that’s a story for another post.
The results: data doesn’t lie
Enough theory. Let’s look at the real data.
The chart below shows an actual Clotted Cream session, with data exported from Blynk — real temperature vs. set point, minute by minute:
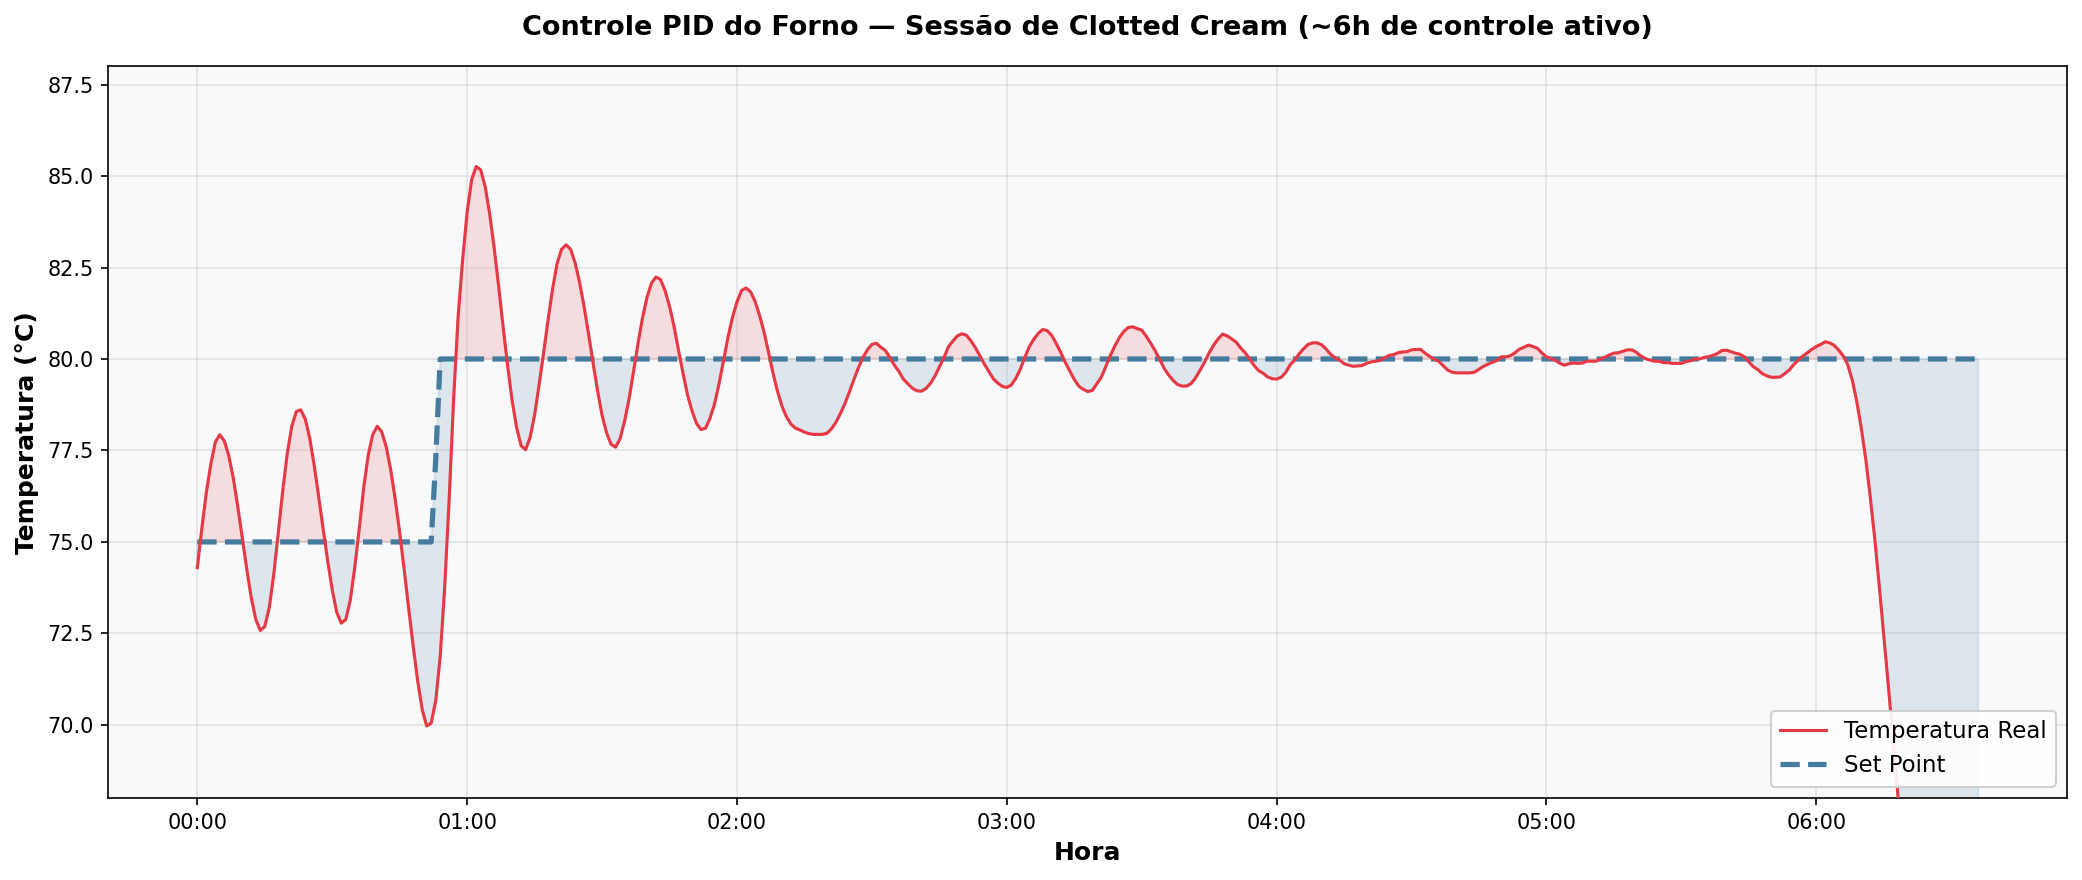
What this chart tells us:
- Initial phase (00:00 – 01:00): the system was running at SP=75°C, oscillating normally. When I changed the set point to 80°C, there was a natural overshoot up to ~85°C
- Settling phase (01:00 – 03:30): oscillations gradually decrease as the PID learns the oven’s thermal behavior
- Stable phase (03:30 – 06:00): the PID found its sweet spot. Temperature stays practically glued to 80°C
Now let’s zoom into the stable phase:
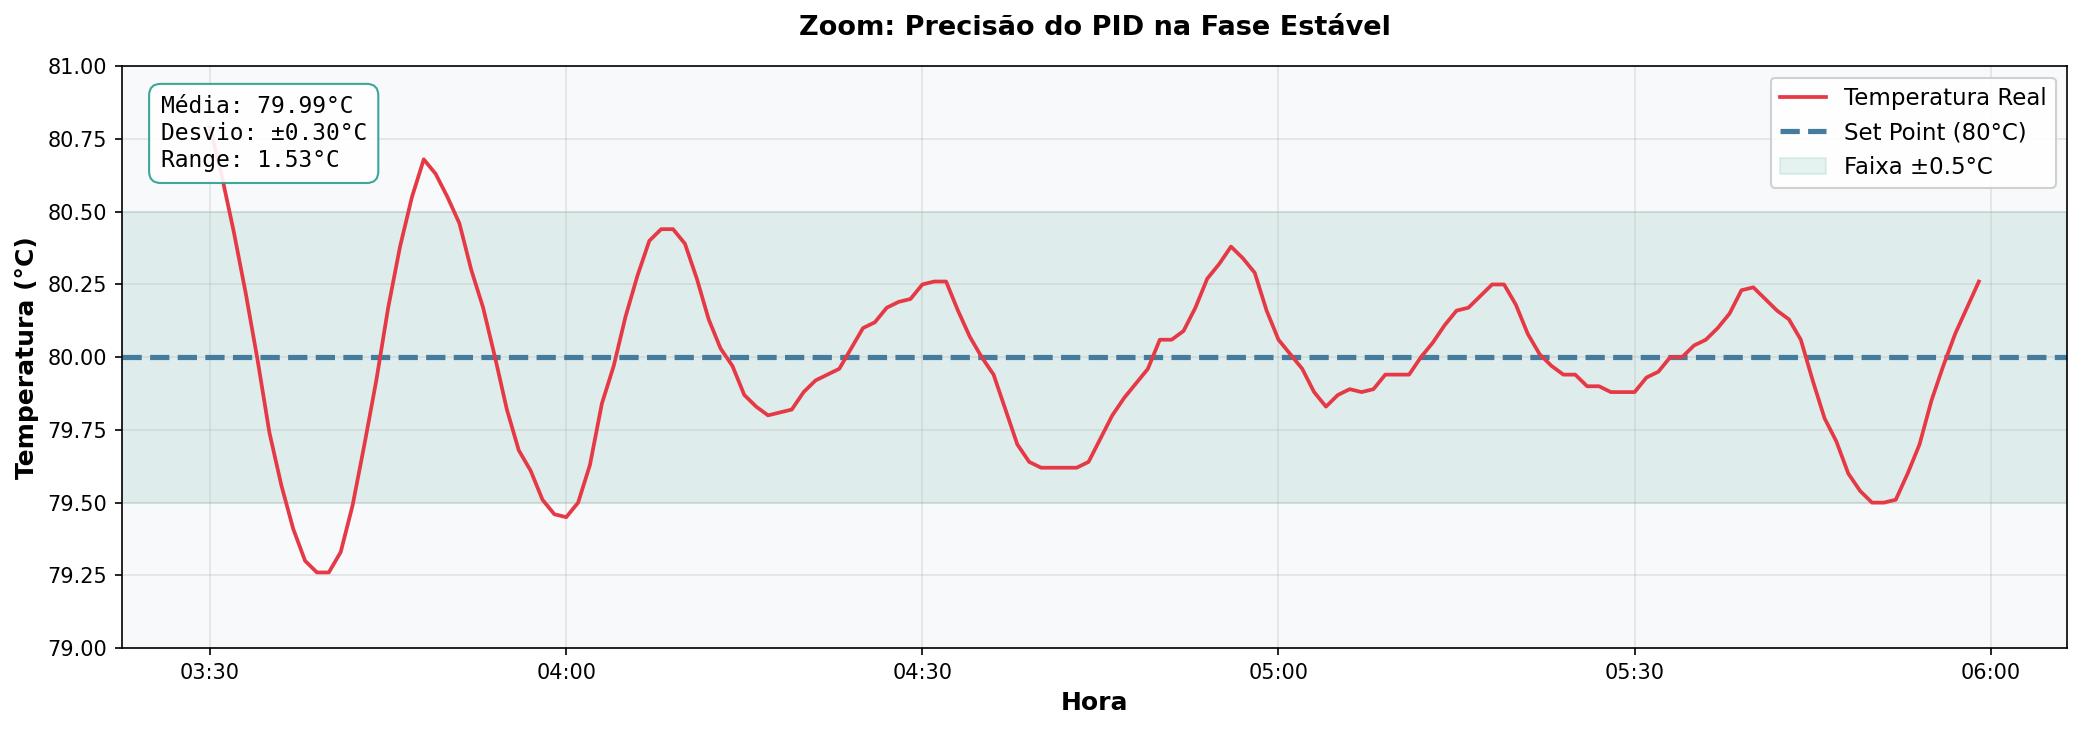
The numbers that matter
| Metric | Value |
|---|---|
| Average temperature | 79.99°C (176.0°F) |
| Standard deviation | ±0.30°C |
| Total variation | 1.53°C (79.26 – 80.79°C) |
| Set point | 80.00°C (176.0°F) |
To put this in perspective: a typical household oven oscillates 15 to 20°C around the set point. This system oscillates 1.5°C. That’s more than 10x more precise.
The icing on the cake (literally): 3D printing
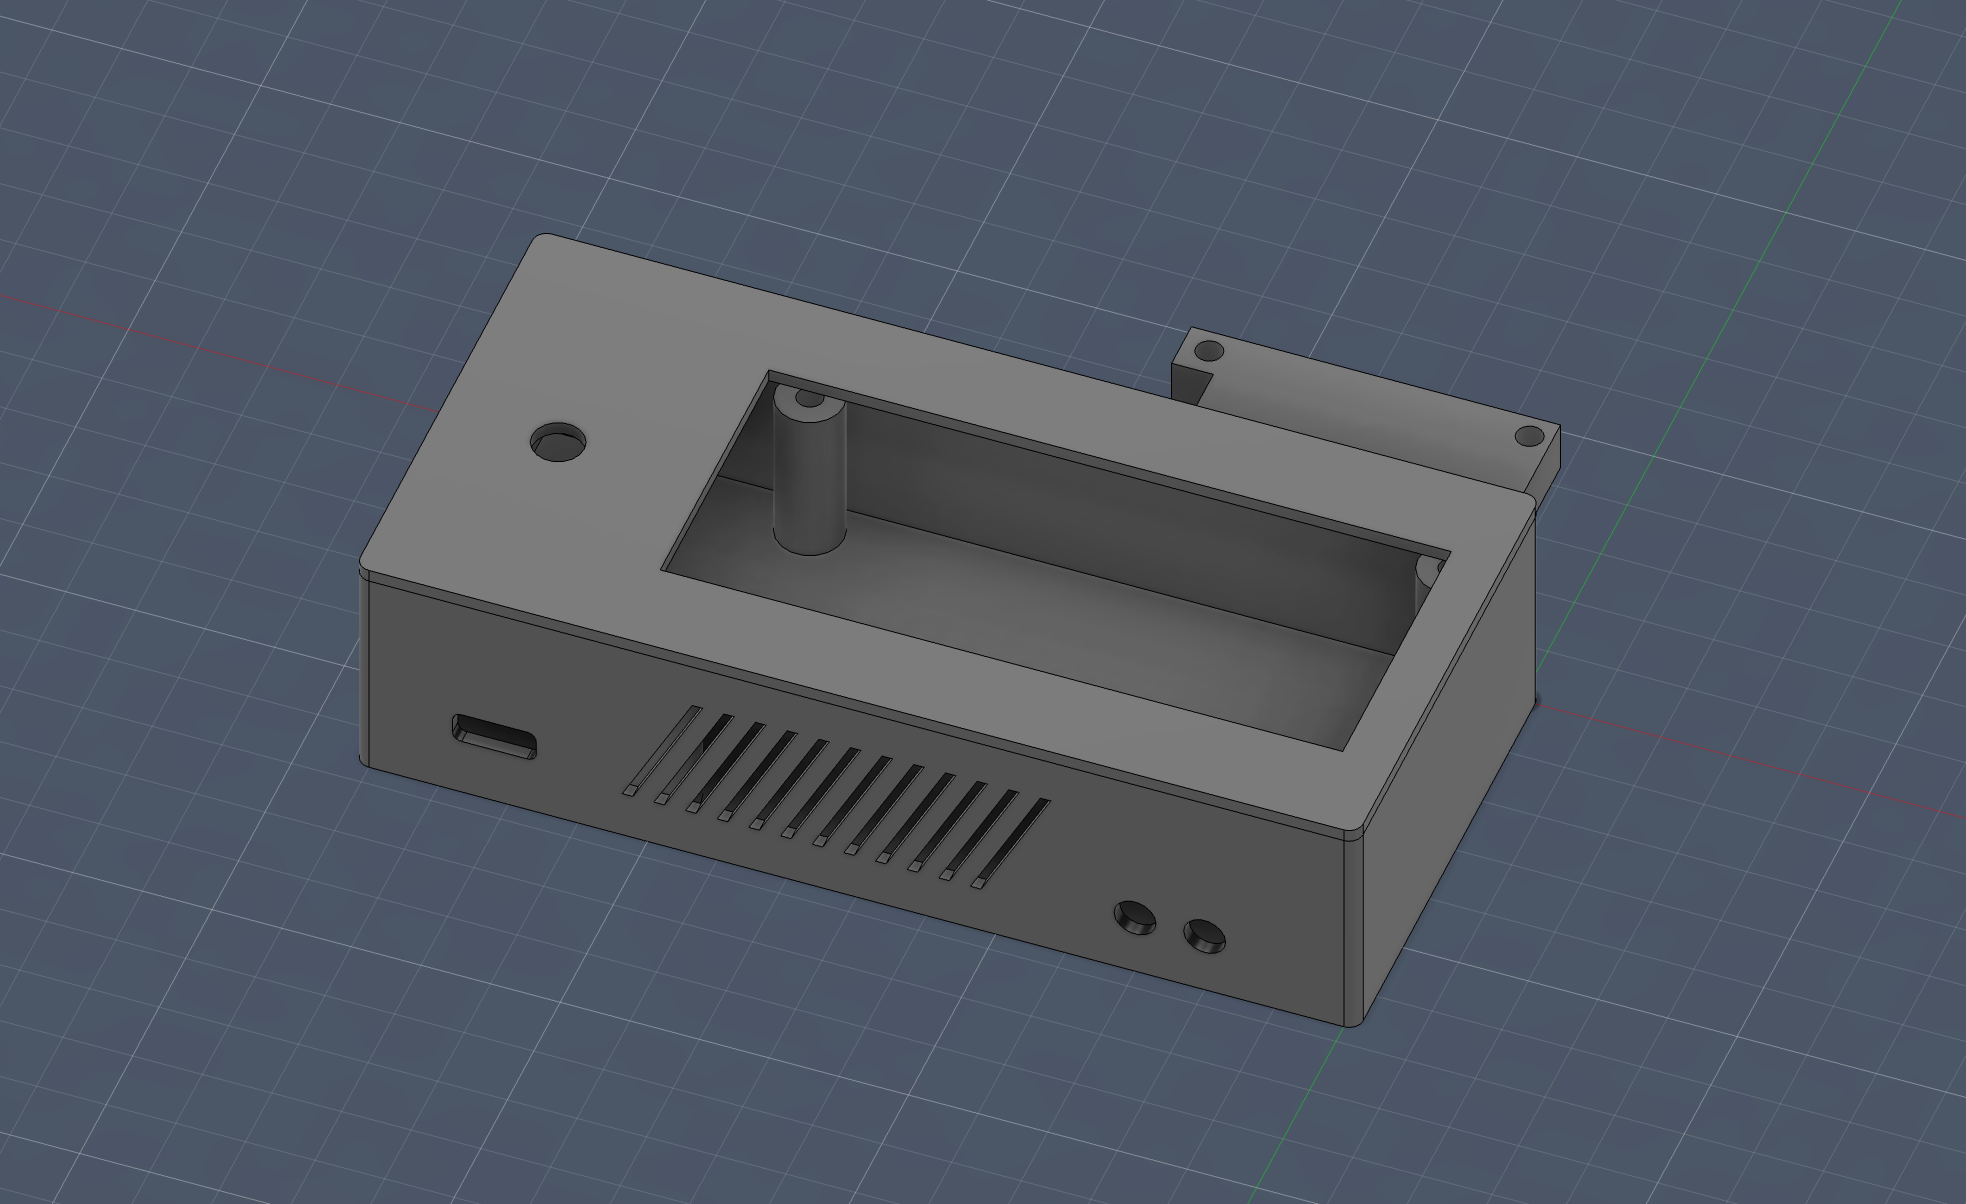
Having a functional project is one thing. Having a project with a professional finish is another. The 3D printer is what transformed an “engineer’s hack” into something you’re not embarrassed to leave on the kitchen counter.
The enclosure was custom-designed to:
- Fit the LCD and encoder perfectly
- Provide ventilation for the ESP32
- Allow organized cable routing
- Look good sitting on top of a kitchen oven
And the Clotted Cream?
Oh right, because at the end of the day, this was all about making a cream.
It turned out perfect.
12 hours in the oven at 80°C, with minimal temperature variation. The golden crust formed exactly as it should. The texture was dense, creamy, velvety. It passed the most rigorous test there is: wife approval.
And beyond the Clotted Cream itself: I now have a precision temperature controller that can be used for anything. DIY sous vide? Sure. Food dehydrator? Sure. Tempering chocolate? Sure. Controlled fermentation for bread? Sure. The possibilities are endless when you have precise temperature control.
Want to know more?
- Full source code, wiring diagram, enclosure STL, and documentation: github.com/vitormelon/esp32-pid-thermostat
- How AI helped (a lot) build the software in 1 day: AI cooks really well these days, but someone still needs to know when to add salt
The project is open source (MIT), so if you want to build your own, the repository has everything: bill of materials, wiring diagram, step-by-step configuration guide, and even the STL file for 3D printing the enclosure.
Project numbers
| Development time | ~1 day |
| Lines of code | ~2,500 |
| Hardware cost | ~$15 USD |
| API cost (Claude) | ~$30 |
| Modules | 10 |
| Precision achieved | ±0.30°C |
| Happy wife | ✅ yes |
If you have an old oven in the garage and a culinary (or industrial, or scientific) motivation to control temperature with precision, consider this your invitation. The code is there, the enclosure is there, and the Clotted Cream… that one you’ll have to make yourself.
Questions, suggestions, or recipes? Hit me up in the comments, by email, or on social media. And if you make your own Clotted Cream with this setup, send me a photo!